Learn how to clean oven like a pro with our step by step guide. Achieve a sparkling oven for delicious meals. Oven cleaning is a task many dread, but with the right techniques and tools, you can make your oven sparkle like new.
Before you start: preparation
Prepare the Area: Place a towel underneath the oven to prevent spills and greasy residue or damage to the natural floor surface.
Remove the trays and racks: Place them in the sink; sprinkle dish liquid and half a cup of baking soda and soak in hot water for 30 mins.
How to clean oven – A step by step process
Step 1: Apply oven degreaser
Spray thoroughly with oven degreaser, including the sides and back, and let it sit for a few minutes.
Step 2: Scrape off excess grease
Remove large crumbs, gunk, and food leftovers using a metal scraper and brush.
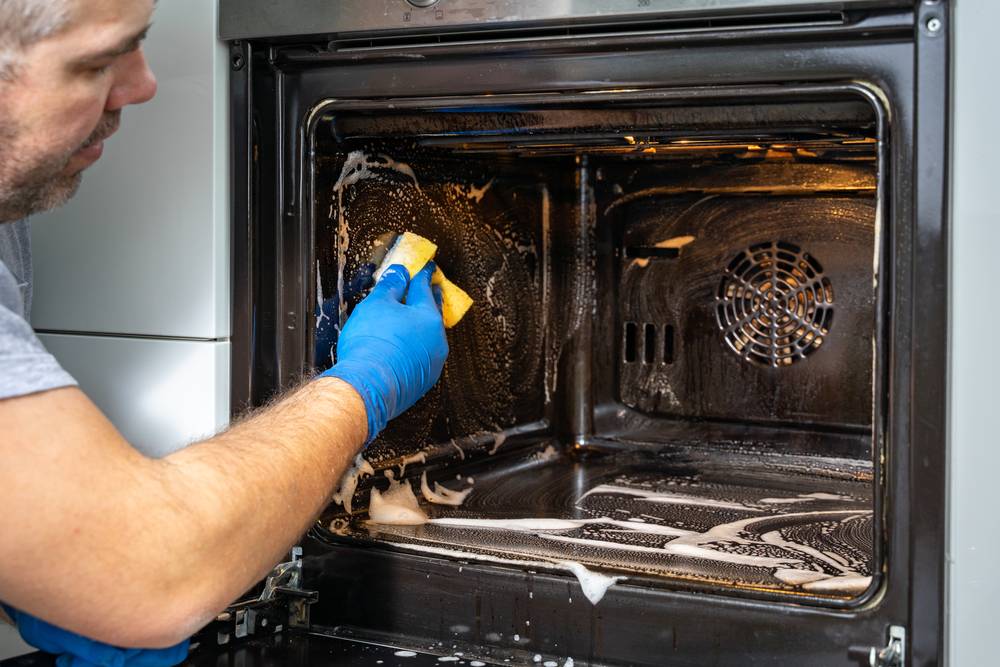
Step 3: Wipe down the interior
Baking soda (sodium bicarbonate) is a basic compound, which means it’s alkaline in nature. When it encounters acids, like the ones found in oven grease and food particles, it neutralises them. This reaction helps break down the grease’s acidic components and produces gas (carbon dioxide), which can help lift and loosen the grime, making it easier to clean.
- Sprinkle the baking soda all over the oven’s interior
- Spray with water or a solution made of 3:1 water to white vinegar
- Spread the paste inside, and leave it for 30 minutes
- Wipe up the oven interior to clean the residue using the vinegar solution
Step 4: Clean the oven door
Take off the oven door and clean the glass from both sides using glass cleaner and paper towels. Again, you could use a baking soda and white vinegar solution with water and superfine grade steel wool to clean off the baked-on grease.
Step 5: Scrub and rinse
Scrub the racks with a brush and medium duty scrubbing sponge inside the sink until clean, then rinse with fresh water.
Step 6: Polish the door glass and oven exterior
Use window cleaner to clean the door glass and oven exterior and to remove residue.
Step 7: Reassemble
Place the trays and racks back into your oven if they are completely dry.
Step 8: Turn it on for 5-10 mins.
To ensure your oven is ready to be used, turn it on at maximum heat for 5-10 minutes right after cleaning. Doing this will prevent the cleaning solutions from affecting your food and odour.
How do I keep the oven clean when I’m cooking every day?
- Wipe After Use: Wipe down your oven to prevent grease buildup once cooled.
- Foil to Cover Food: Use tin foil to prevent greasy spillages from splashing onto elements like the grill or the oven door.
- Clean Spills Immediately: If you notice any spills after cooking, tackle them right away before they dry and become hard to clean
- Use a Drip Tray: Place a baking sheet beneath dishes to catch drips, making cleanup quicker.
How often should I clean oven like a pro?
If you love home cooked meals, deep cleaning them every 2 months should be sufficient if you follow our DIY cleaning guide. For the ones who prefer dining out as often as possible, cleaning it every 4-6 months may be adequate for occasional cooking.

How do I clean the Range Hood?
To clean your range hood, first turn it off and unplug it. Next, remove the filters under the hood and soak them in warm water, dish detergent, and baking soda for 15-30 minutes. While soaking, gently clean the outside of the hood with a soft cloth and a suitable cleaner; to clean the stainless steel surface effectively, use a mild detergent while avoiding scrubby or abrasive materials that could cause damage. For a brilliant finish, use a microfiber cloth to polish the surface, restoring its shine. To clean the filters:
- Scrub them with a soft brush and rinse them with warm water to remove all soap residue.
- Carefully clean the inside of the hood using a kitchen degreaser to remove the grease from accessible surfaces.
- Allow the filters to air dry before returning to their original positions.
In addition to this guide, for best results, we highly recommend you arrange a Professional Oven Cleaning Service at least twice a year to save yourself time, hassle and extra effort.
Advantages of professional oven cleaning
- Regular cleaning of any appliance by professionals will prevent buildup that can cause damage over time.
- A clean oven cooks more evenly, enhancing the flavour of your dishes.
- A dirty oven takes longer to heat up, consuming more energy; thus, professional oven cleaning improves the efficiency of energy consumption and the time required to cook.
- The professionals have the right tools and chemicals to achieve the best results.
- It saves you valuable time. If you must do it independently, you will need at least 1.5-2 hrs to accomplish this task.
Regardless of your cooking frequency, if you notice any unpleasant odours or smoke during cooking, it is a definite sign that it’s time to contact professionals and book your Professional Oven Cleaning service.
Conclusion
Cleaning your oven like a pro is more manageable than it seems. With the right approach and attention to detail, you can achieve a sparkling clean oven that functions efficiently. Follow this guide, and your oven will be ready to deliver delicious meals for years.
Ready to enjoy a sparkling clean oven without the hassle?
Get your instant quote for Paul’s Cleaning Professional Oven Cleaning service today and let our experts care for the rest.