Your kitchen hasn’t your kitchen been cleaned in a month? Then, serious kitchen cleaning is due, and let’s go in-depth to know how to clean a kitchen in a good way.

A clean and tidy cooking area is essential to every household, and although not used as often as other living areas, your personal wine and dine spot often gets neglected. Sometimes, for as long as 4 weeks. Even if you do not struggle with weekly kitchen cleaning, roll up your sleeves and get ready for a deep clean.
With that in mind, if you have neglected your kitchen for as long as a month, this guide by Paul’s Cleaning Company aims to help you get back on the cleaning track. Our cleaning checklist ensures that you restore the kitchen to its former glory, regardless of your desired approach to cleaning.
Cleaning products for a one month old dirty kitchen
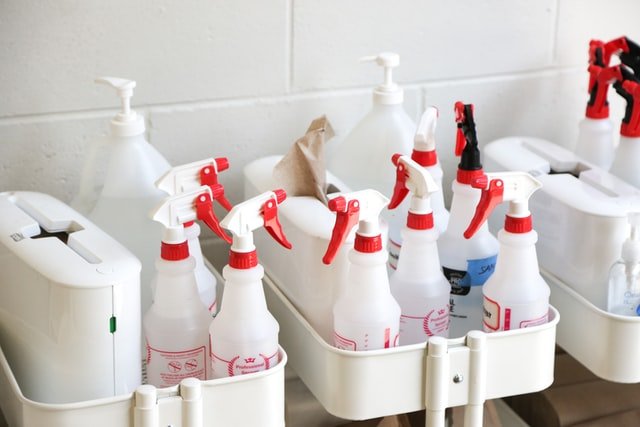
Before you move on to the ultimate deep clean checklist for poorly cleaned kitchens neglected for up to a month, make sure that you have the right cleaning products at your disposal.
Here’s a quick rundown of the recommended items:
- Dish soap (bought or crafted).
- Kitchen cleaning liquid (bought or crafted).
- Spray bottle.
- Kitchen towels.
- Microfiber cloth.
- Soft-scrub sponge.
- Wire wool.
- Broom.
- Mop.
- Vacuum cleaner.
Call us for help with professional domestic cleaning or maybe specialised oven valeting with a bit of tile and grout cleaning? Do not hesitate if you’d like to use an expert company.
The ultimate how to clean a kitchen deep clean checklist
If you are ready to clash with month-old dust, dirt, and grime in the kitchen, prepare to work up a sweat and follow the checklist steps.
Also, keep in mind that it features an all-around, general approach to deep cleaning your kitchen. You may want slight redesigns while cleaning. Consult professionals to help you renovate your kitchen space, improve the layout, flow, look, feel, and survive.
But it is better to think about this option right away in order to understand your time and material costs.
Clean cabinets & drawers
You will need to determine how dirty your cabinets and drawers are. If they are covered with grease, you should prepare a degreaser, soft-scrub sponge, small scrub brush or toothbrush, and a kitchen towel or microfiber cloth.
The safest way to tackle the grease is to use a specialised degreaser, says Trough and Trough Elite Cleaning. By doing so, you will ensure that the cabinet or drawer coating and paint remain intact.
However, you can also soften the grease by opting for dish soap and hot water instead. After the greasy spots have softened, clean them with a soapy sponge or a brush.
To remove any potential leftover residue, dry the surface with a kitchen towel or microfiber cloth.
On the other hand, you can use some warm soapy water, a sponge, and a microfiber cloth if your cabinets and drawers need freshening up.
Take the sponge soaked in warm, soapy water to clean the surfaces and dry them immediately after. This way, you will prevent any streaks from appearing on the polished parts of your cabinets and drawers.
Wipe kitchen seating, cook tops & splashbacks
Just like with cabinets and drawers, you need to tend to the grease on your kitchen bench similarly. To remove grease stains from a wooden kitchen bench, use a degreaser made specifically for wood. Avoid using harsh scrubbing cleaning items such as wire wool.
If your dirty kitchen bench is made of other materials, you can opt for universal cleaning solutions instead. However, be mindful of products that are rich in acid if you have a stone kitchen bench because they can cause irreversible damage.
With that in mind, a cleaning liquid, spray bottle, sponge, and a cloth will suffice for less dirty kitchen benches, cooktops, and splashbacks.
- Wet the dirty surfaces and spray with your cleaning liquid.
- Allow the solution to work its magic by letting it sit for a couple of minutes.
- Gently scrub and dry the cleaned surfaces with a kitchen towel or microfiber cloth.
Clean the sink
Although the sink is where all the washing happens, it is practically a dirt magnet. It accumulates tons of grime and food scraps. Lack of waste control of what ends up down the drain, your sink can clog easily.
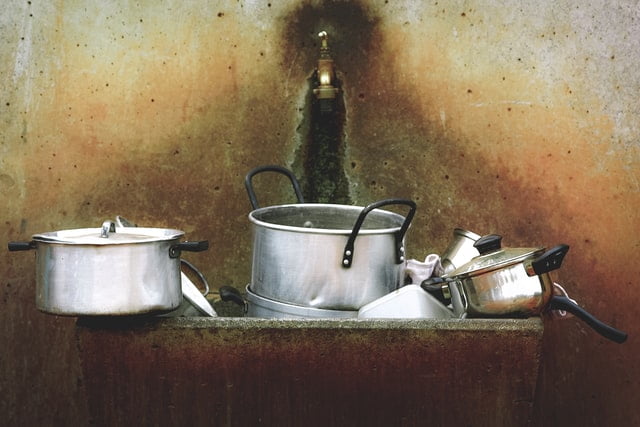
With that said, they make most kitchen sinks of stainless steel. Since stainless steel sinks are prone to limescale build-ups, you will need some limescale remover, a sponge, or some wire wool to clean them.
Spray the affected surfaces, scrub them, and rinse well. Additionally, you can use some metal polish once the sink is dry. It will help preserve the sink’s cleanliness and keep the limescale at bay for a while longer.
Lemon juice and bicarbonate of soda will also help clean the sink itself, but a slightly more aggressive mixture will flush the drain. For DIY, try a combination of home ingredients, such as vinegar and bicarbonate of soda, which helps dissolve residue left in the drain.
Clean the oven
- Remove the oven racks.
- Soak them in soapy water while you tend to the inside of the oven.
- Use the oven cleaning product of your choice.
- Apply the cleaning solution, scrub the inside of the oven with a sponge, and wipe the cleaning solution out.
- Scrub the racks with some wire wool.
- Dry them out.
- Put them back inside.
Clean the dishwasher
- Move over to your dishwasher after you have cleaned the oven.
- Use any homemade or store-bought product.
- Run a cycle with it to clean the dishwasher from the inside.
- Clean the filter.
- Remove any food debris.
- Wipe the seal.
Clean the fridge
- Tend to the fridge.
- Empty your fridge by taking out all the groceries, shelves, and bins.
- Soak the shelves and bins in soapy water, clean them, and dry them with a kitchen towel.
- Use an all-purpose cleaner.
- Clean the walls of your fridge with a cloth.
- Put shelves and bins back inside when ready.
- Organise groceries.
- Use a homemade paste to clean the inside of the oven.
- Tend to the racks with a different cleaning solution — preferably rich in acetic acids.
After emptying the fridge and removing the bins, soak the bins in a mixture of water and baking soda. If your fridge has a stainless-steel exterior, wipe it with a microfiber cloth.
Again, you can make use of the cleaning solution mentioned above: two-parts water and one-part vinegar.
Empty trash cans
You will need an all-purpose cleaner, a sponge, two pieces of cloth, and elbow grease to clean your trash can(s).
- Spray the can with the cleaner.
- Grab a sponge.
- Give the can a good overall scrub.
- Dampen a clean cloth.
- Use it to wipe the solution off.
- Fully remove the cleaning solution.
- Rinse the can with water.
- Dry it using a microfiber cloth.
To remove unpleasant odours while sanitising your disposal:
- Opt for a loaf of bread soaked in vinegar.
- Put the vinegar-soaked loaf in the canister for about fifteen minutes.
- Flush with cold water.
- Follow up with frozen lemon rinds.
Bring the shine back to the floor
Do not forget about the How to clean a kitchen floor, after a month of negligence, it will need a thorough cleaning. Depending on your floor type, you can sweep, vacuum, mop your floor, or combine all three techniques if needed.
In general practice, you will need:
- A vacuum cleaner.
- Floor cleaning products.
- Small brush.
- A mop.
- Soapy water.
Strength to deep how to clean a kitchen floor. Then:
- Vacuuming the floor.
- Spray some cleaning solution.
- Brush the crevices on the floor to remove the excess dirt.
- Once you are satisfied with the results, add a finishing touch by soaking the mop in soapy water and wiping the floor.
Why mass produced cleaning solutions are not always optimal
When somebody mentions cleaning, mass-produced cleaning solutions are likely to spring to mind. These disinfectants keep our household surfaces dirt- and grime-free, and also offer indirect support to our immune system. After all, Paul’s Cleaning Company cannot hope to maintain our health in a bacteria-infested environment.
Be that as it may, most shop bought cleaning solutions have one major disadvantage — they are not environmentally friendly. It is not just about their chemical attributes, but the disposable packaging as well.
While it may not seem like one or two single-use plastic bottles will make a difference, incinerators and landfills beg to differ.
With that said, the concept of prudent recycling and environmental conscientiousness in cleaning is not a novel idea. For this reason, more and more people are being drawn to the guiding principles of the zero waste movement. You, too, may look for ways to contribute to the cause. If that is the case, read on for some tips and tricks which include environmentally friendly products.
Read: How to Create a Clean and Non-Toxic Environment for Your Child’s Play
Ingredients used in environmentally friendly cleaning
If you are looking for sustainable cleaning solutions, zero-waste kitchen cleaning recipes will come in handy. They ensure natural ingredients, so potential waste and hazards are minimal.
The zero-waste approach to cleaning is a straightforward process that won’t take up a lot of your time and is both time and cost-efficient. To make the most of it, here is a list of ingredients that are sure to leave your neglected kitchen surfaces sparkly clean and disinfected:
- Alcohol – Both pure ethanol and alcoholic drinks make for excellent antibacterial cleaning solutions. Moreover, alcohol’s fast evaporation times are useful in speedy surface cleaning.
- Bar Soap – Also known as Castile soap, a natural vegetable-oil-based product. It is vegan-friendly, multi-purpose, and has great cleaning properties.
- Essential Oils – Some essential oils have their own antiseptic or degreasing properties. They also add natural fragrances to your cleaning mixtures and thus your home.
- Lemon juice – Lemon juice is an exceptional natural substitute for citric acid. It acts as a cleaner, disinfectant, and freshener at the same time. Lemons clean ovens fabulously.
- Salt – Regardless of its type, salt is a natural ingredient useful against stains and grime. It is abrasive and absorbs water easily.
- Vinegar – This is a natural ingredient rich in acetic acid. It disinfects surfaces and dissolves any grime, grease, or mineral deposits.
- Washing Soda & Soda Bicarbonate – You will find these two types of soda as an ingredient in most DIY cleaning recipes. They cut through dirt, grease, and grime better than bar soap does and are easier to rinse off. Still, you should be mindful of how you use them.
Keep your kitchen clean
As you can see, deep cleaning a kitchen that hasn’t been cleaned in a month can be as simple. It does not require you to go out of your way in any shape or form. Of course, you can expand on your desired approach by crafting your own dishcloths or using environmentally friendly brushes, sponges, and dish gloves, to name just a few.
In the long run, keeping your approach simple is the best way to go about how to clean a kitchen. For more advice, follow the rest of our tips